Sunday, October 30, 2011

Structure Free or Structure Pro?

So this weekend is going to be really fun! Kevin and I are up at UOP for Halloween right now about to get our awesome costume matching going!!!

<-------- Boy Scout and a Camper lol

10.26.11

So, Keypad (4) makes the play button turn into the looping button!

So the next plugin we are about to start using is called Structure Free. We debated in class whether the name includes Free because it was free or if it emilinates... structure.... Who knows.

Structure Free is a type of virtual sampler with synth qualities and prerecorded sounds. When first opened, it defaults to the sine wave.

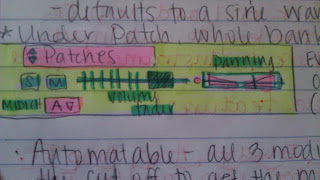
Under Patch, which is a sound selection, you can choose from a list of sounds. Every patch has its own set of smart knobs.

Smart Knobs are different for each patch setting. And each smart knob is automatable when you press all 3 modifiers and click. When you mess with the cutoff setting you can get the effect of listening to music from the other room.

Key Switches - do not produce audio, they control some sort of process that most likely has to do with a looping patch. The key switches will switch between loops of one kit or bewteen the regular and harmonic settings of the guitar.

You can add a new patch if you click the patch button and select new patch. But you have to make sure they all go to A1.

When you add a new Patch, it will turn Structure Free into a kind of Xpand plugin with multiple patches going at the same time.

There are a few knobs called the Transpose, Pitch Bend, Mono Mode, adn Key Range knobs. They are all pretty explanitory.

Key Range - You can set this knob so that certain instruments will come in at certain points on the keyboard.

Under Filter II, there is the Filter, Envelope, Amp, and Amp. Envelope. Here you can adjust the cutoff, resonance, and/or Env. but we don't have to worry about the filters.

An LFO, or a Low Pass Filter, adjusts the rate of a sound to get the oscillating effect. Anything in the modulation settings is run by an LFO. It is a control signal we cannot percieve; we can only percieve the effects the LFO produces!

Thoughts

I am lagging on my project. I don't know if I'm bad at film score or if I'm just still learning... Whatever it is, it needs to cut it out so I can get my creative juices flowing!!!!

Friday, October 28, 2011

Vaaccuumm.

No class on Halloween!

This class was all about the next plugin, Vacuum. Vacuum is cool because it emulates a classic synthesizer with two Oscillators and a bunch of other cool manipulations and presents.

10.24.11

VTO: Vacuum to Oscillator. There are two of these, VTO ONE and VTO TWO. Each VTO has four knobs that control....
  • Range - The octave of notes to be played
    • When set to Wide, the range in Fine will automatically be across fie octaves
    • When not in Wide, the range can be up to seven semi-tones
  • Fine - Fine tuning the notes to achieve special intervals
  • Shape - Changes the shape of the waveform, includes Saw Tooth, White Noise, Triangle, and Pulse 
    • This knob is parametric so it doesn't have to be one of the options, it can be in between! 
  • Envelope - The amount of the VTO that is being sent to the Envelope
What is an Envelope? It controls the ADSR or the Attack, Decay, Sustain, and Release. Envelopes deal with time and volume, not frequency like low and high pass filters. 

Compressors, Dynamics, Gates, sometimes EQs, Limiters, and Faders are all able to manipulate the envelope of the sound. 

Best thing ever... Screen Shot ------> Shift  3 to take a picture of the entire screen and save to the desktop, and Shift  4 to drag a selector tool across the area intended for the picture, which is also saved to the desktop!!! The computer will even make an awesome camera sound!

In the VT HPF or the Vacuum to High Pass Filter and VT LPF or Vacuum to Low Pass Filter, you can control six knobs! Filters are mostly used to remove a part of the sound.. When using one of these filters, the grayed out sections will not be completely gone, just muted. 

A High Pass Filter deals with frequency. This kind of filter, filters out everything except the high frequencies. There are different kinds of shapes that produce different kinds of filters like a shelf, bell, or peak. 

A Low Pass Filter will diminish everything except the low frequencies making the sound become more bassy. 

Something called the Proprietary Hump which produces a nice effect. It will hype the high frequency right before the cutoff. Good to know! The six knobs are....
  • Reso - which controls the resonance of the sound.
  • Slope - for every octave going down, it is 0-24 db, but the most musical is 6 db.
  • Cutoff - I like this effect, it makes it makes the sound either muted or clear so you can get a cool closed door effect if needed.
  • Sat - or Saturation of the tube.
  • Env 1 - The amount going to the Envelope
  • Key Trk - Key Track
The Ring Modulator - This was hard to swallow. It is the sum and the difference of the two oscillators added together. It takes the two pitches and mixes them... It ignores the harmonics completely. 

Last, there is the arpeggiator and the modulator and we already know what those do! Just flip the switch and let the magic happen!!!


Thoughts

This thing sounds awesome, must use in my project!

Happy Halloween!

I was a Boy Scout one night....

and White Trash the next --------------------------->

But really, no one got my costume because I left the beer can at home along with my fake cigarette.

They just thought I was pregnant... For real. lol

YAY :)


Thursday, October 20, 2011

It's that Simple. Boom

Did you know that if one uses the word "boom" after a sentence, the sentence immediately becomes epic? Yes, epic. The term should only be used in a sentence if the point being made is epic. So.... if you don't have something awesome to say, don't say it at all and definitely don't use Boom after it.

Example: I'm a music recording major, I live by the beach, and I love life. I'm awesome. Boom.

Anyways, last Saturday I was asked to set up the DJs at the BBC because the two sound techs scheduled that night couldn't make it and no one else was answering. So I've been trained once and I only set up the stage for a full band so I was a little in over my head when I got there. I have this tendency of not trying to do something if there is a chance of failing miserably. So I wont even try. That was supposed to be Saturday night, but for some reason I tried and guess what? I totally set the entire thing up for both DJs with all the right knobs and converters and auxiliary stuff and it was awesome. I'm so proud of myself for trying because I never would have thought I could do that. I really feel like a Music Tech Major now.

Does she know what she's doing?
She's a sound tech.
Yeah, I'm a sound tech. Boom.

10.17.11


Monday was a fun class, we worked on Boom all class. Boom is a drum machine in Pro Tools under the Instrument Plugins. It comes with 10 different drum kits inspired by drum machines with different timbres.

There is a screen with a bunch of knobs and clickable tabs that look like a real drum machine. Up in the top left corner is a small matrix that one can punch in the beat like in FL Studio. When the little dots light up, you know that you have selected that beat (1-16) to sound. For example, on down beats (1-4) 1 and 3 are the kit drum and on the other two off beats 2 and 4 are the snare drum.

Each little light up dot have 3 different levels of velocity and intensity before the dot is turned off again. And there are 4 vertical gray bars that mark the down beat.

Each horizontal display "kick" or snare, clap, rim, tom, corresponds to the vertical instrument above the tabs.

There are 2 different options called Pattern Select and Pattern Edit. Basically, one can pattern select the pattern of grooves on the tabs and then switch to pattern edit to either clear the entire pattern, start over, simple edit, or change a sound for each of the 16 grooves per kit.

BUT WAIT! THERE'S MORE!!!

Click on the 3rd bar at the top where is says BOOM, and open a drop menu under pattern edit and select and you open up every possible sound in the plugin to mix and match different parts of all the kits!!!!!

SOOO, when you have a song you want drums for, you can edit or create all your patterns under each of the 16 tabs and then play them on the MIDI keyboard depending on the tab that groove is under!


<-------------------- Right here you can see the panning bar which controls what side of the speakers the sound will come out of so you can get a full drum set sound.
<-------------------- Here you can see the Level knob which controls amplitude or volume.

<-------------------- Next is the Tuning Knob so you can choose what tone the drums are if one chooses to use that option.
<-------------------- Here is the Decay knob which controls the length of the envelope that lengthens or shortens the decay of the waveform.
<-------------------- You have 2 buttons here to either solo or mute this specific drum sound.
<-------------------- This is the pattern you are working with such as Nine-O or Dance 1.
<-------------------- This is the name of the specif sound you are editing or using like Kick.


The speed of the beat depends on 1) the tempo that is selected in ProTools and 2) the option in the Boom plugin that is selected, either half speed, double speed, or normal speed.

You can also copy a pattern by clicking copy above the pattern you want to copy and when all the tabs start blinking, you can select the tab you want to copy the pattern to.

When in Pattern edit mode, you can use the large tabs to see only the LED light up dots that correspond to that specific sound.

Up at the top of the plugin is the drop down menu that says factory default. By clicking the + and - buttons, you can scroll through all the different beat kits.

The MIDI keyboard must be properly mapped because Boom corresponds to C3-C4 because it controls the big tabs.

Thoughts

I like Boom and I am excited to try hard to get the drum thing down because it is one place that I struggle. I like simplicity and so multiple layers of different instruments is really difficult for me to hear and achieve in my music. I can already tell that I am having a hard time with this concept in my video project.

Anyways, let's just try because you can't succeed or learn if you never put yourself out there. Boom.

SR

Thursday, October 13, 2011

Xpanding Your Horizons

From Left: Kevin Lienhard, Stevie Rae Stephens, and Adam Pardee..... Original Piece by Kevin.

It's been a long week for me apparently lol

10.10.11


To add more tracks once you've clicked Shift  N, simply Ctrl  again to make as many more tracks in the pop up window.

The Xpand II Synthesizer!!!

The Xpand Plugin combines four different instrument options called parts. Each part is called either A, B, C, or D and each part can host an instrument. Soooo you can have multiple sounds per MIDI message when you play the keyboard. It's pretty cool.

Xpand II provides an intense bank of instrument sound options, each with a large amount of individual patches, or plugin settings. For instance, withing Acoustic Pianos, you have about 20 different kinds of acoustic pianos like Edgy Piano, Studio Grand, etc.

With each patch comes the smart knobs. In the "Easy" option of knobs, you can control the entire plugin (All the active Parts A, B, C, and/or D) at once with settings such as Fine Tune, Attack, Release, Cutoff, an Envelope Depth.

If you just want to deal with one individual part, let's say part B, we can pull up individual part knobs that control settings that are specific to the patch like glide settings in a sax patch.

The drop down menu with numbers 1, 2, 3, and 4 control the MIDI channel.

Level controls the individual volumes of each part. This can be automated as well by using all 3 modifiers and clicking.

The cool part about this plugin is the fact that it acts as its own bussing system :) Fx 1 and 2 at the bottom act as busses for the entire instrument. Just make sure you TURN THEM ON FIRST. They are also serial busses meaning Fx 1 will go through Fx 2 if its turned on, if not, you just have the sound bussing through Fx 1.


I especially like this button because there is an incredible amount of options for automating stuff. This is where you go if you know exactly what it is that you want to automate otherwise you will be lost in the vast sea of automatable shit :) Boom.

As a side Note -------------> the Xpand Plugin is NOT Protools.... Protools is just a pal that let's Xpand crash at his place :) It's a win win situation really hah

For each part, you can select Play Mode, Arp Mode, or Mod Mode.

Play Mode settings include Monophonic and Polyphonic options, Pitch Bend Range up to 12 pitches and key of the instrument.

Arp Mode = Arpeggiate Mode which affects the rate of the arpeggiation of a chord, what mode or kind of arpeggiation, what direction the pitches will be arpeggiated, and Latch Mode. Latch will make the chord you arpeggiate play forever until you press another chord or turn off the Arpeggiator.

Mod Mode controls the Modulation wheel. You can control the rate, depth, pressure, and kind of waveform (sine, square, triangle, saw...)

All of these controllers and options come in handy when making awesome music :)) I will definitely be using it for my video project....  I'll talk about that in a minute.

10.12.11


On Wednesday, we had a class visitor. His name is Bill Faff. He and Drew taught together in New York. He is a composer, theory buff, performer, musician, and counterpointist! <--- That's awesome.

He put on a Bach Cello Suite in Dm and had us analyze the structure, form, and chords in class. I had a really good time doing theory for the first time in a while!

He went over aspects of engineering and composing that are important for us to know such as.....


  • Dynamics
  • Texture
  • Cadence
  • Contrast
  • Idiomatic Consideration
  • Counterpoint
  • Harmony
  • Rhythm
  • Melody
  • Meter
  • Key
  • Register
  • Timbre
  • Amplitude
  • Color
All of these things are key to getting us (Music Engineers, Recording) ahead of the game because understating of these aspects will enhance our ability to make good recordings of performers. 

Some key terms were Anacrusis, or a pickup as I know it... and idiomatic, which means a piece is written with a certain instrument in mind and "considers" the acoustic properties and parameters of this instrument.... 

He spoke about color and how this aspect is so important in the composing of a song. I realized that I will have to be looking for good color in my video project. The guitar, cello, voice, and piano all contribute different kinds of color to a piece and provide contrast and variety. 

We went over the different kinds of form and how to hear them. It was a really fun lesson and Bill was very entertaining and animated. 

Thoughts

I have a lot of work on my plate right now and I am really looking forward to working more on my video project. It's really long and I have to really sit down and figure out what it is that I want to do. I think I just need to find one thing that I am for sure about even if that means I have to go to a specific part and put in whatever sound I KNOW will go there. 

I have to Xpand my range of comfort, knowledge of instruments, and ideas :) Wish me luck!

Thursday, October 6, 2011

And Kennedy Shot Himself...


I skipped a week so that I would have a lot to blog about at one time since the last few class periods have been more about presenting projects and receiving the next few assignments. 

10.5.11


The video project coming up at the end of the semester has to demonstrate:
  • Low and high density
  • Contrasting instrumentation
  • Contrasting dynamics
  • Contrasting textures
  • Key change(s)
  • Percussion
  • Live vocals - spoken or sung
  • Live instrument - acoustic 


In order to start planning out this project, we had to make a sort of flow chart that plans out every 10-20 seconds of the video and what sounds will play when. 

<----- A little over-board on the single second increments! 

I made my chart in Excel with a lot of colors and instruments. I'm really excited and this really helped with the creative planning process. Even though I don't know what I will end up doing to the music, but I know I have ideas, which is a step in the right direction. 

So, in the next few classes of 306, Drew assigned, talked about, and presented our Lunar Landing projects! 

This was the best assignment yet! I had soooo much fun making this. 

So I used a lot of the internal sounds of my keyboard because I knew that they would come in handy one day. The truth is, I am pretty scared of Hollywood style Aliens due to a traumatic experience when I was two.... 

Thanks a lot Dad.

Anyways, I nearly jumped off my piano bench every time I played a new sound in my earphones! I got over it and made an awesome project. I'm really happy with it and I can tell that I know ProTools a lot better than I did before in just one project. There are sooo many aspects of ProTools that seriously blow my mind! 

#1. Busing audio through an Auxiliary track with a Reverb insert on it will not only clean up your project and enhance work flow, but will also use less processing and you will be able to send everything through the same reverb and achieve a more professional sound. 

#2.  F will pre and post fade all selected audio tracks!!!! Bomb. Cross fading is also useful when two different audio tracks are next to each other.

#3.  Click on the Insert will bypass the insert and you will be able to hear the track/audio with and without the effects. 

#4. In the Automation view of Volume, Panning, or any other desired automatable effect, you can switch between the hand tool and the selector tool with  Click. You can find these automation options in the Track View Selector which is waveform by default. 

#5. The pen pattern tool can create awesome designs like a square wave, triangle wave, and random wave, when you hold down the pen tool and select the desired option. I personally like the triangle design because it makes my voice sound like a Transformer :) 

Tremolo vs. Vibrato.... Tremolo is dynamic and vibrato is pitch which is shifted between semi-tones. 

#6. PitchShift = Select Audio, AudioSuite > Pitch Shift > Pitch Shift > Drag the scroll bar across to find where you want the audio to be pitch shifted to. 

#7. Plugin Automation will show up if you hold down all three modifiers and click = Ctrl Opt  Click and the option to automate the effect will pop up in the Track View Selector.

Some other side notes are that AudioSuite is permanent and so you should probably make a copy of your original audio before you go to town pitch shifting and audiosuiting it! 

You can delete automation in the Track View Selector with the selector tool, just highlight and press delete. 

Parallelism vs. Serialism
As you can see, Parallel would be two effects running side by side, not affected by each other. 
Serial would be one effect going through another effect getting a totally different sound. 

To stop the reverb tail you can automate the reverb effect and draw in a fading automation! 


Automation Key Strokes: 

Option Click will Erase a point made
Control Click will insert a point
Click and drag up will lift a section up when the half rectangle looking tool appears

Busing is for effects processing which will effect only a percentage of the incoming signal whereas Inserts are for dynamic processing which will effect all 100 percent of the incoming signal. Dynamic processing includes de-essers, compressors, gates, limiters, expanders, and (EQ). effects processing includes chorus, flanger, phaser, reverb, and delay. 

Thoughts

I told my mom that we never went to the moon. She said "And Kennedy shot himself. " 

I really am trippin out about the Lunar Landing Conspiracy! What would that mean if everything we think we know about our planet, universe, moon is a ego trip of our Country?? Wow.